De miért? A proxmoxnak van gyári datacenter menedzsere (PDM)!
Ez igaz, viszont ez sokkal szebb és többet tud. Bővebb infó a honlapjukon: https://pegaprox.com
Ez egy nyílt forráskódú szoftver, a készítők szerint az is marad.
Telepítsük fel
Debian alapú disztrókat támogat, én Debian 12-re fogom feltelepíteni, mindössze ezt a parancsot kell kiadni:
curl -sSL https://raw.githubusercontent.com/PegaProx/project-pegaprox/refs/heads/main/deploy.sh | sudo bashEhhez hasonló kimenetet fogsz látni, a végén egy kérdést fog feltenni: melyik porton szeretnéd futtatni?
Én maradtam a default 5000-es portnál (1. lehetőség), mivel a 443 már foglalt. Ha egyedi portot szeretnél használni, válaszd a 3. lehetőséget.
╔═══════════════════════════════════════════════════════════════════════════╗
║                                                                           ║
║   ██████╗ ███████╗ ██████╗  █████╗ ██████╗ ██████╗  ██████╗ ██╗  ██╗     ║
║   ██╔══██╗██╔════╝██╔════╝ ██╔══██╗██╔══██╗██╔══██╗██╔═══██╗╚██╗██╔╝     ║
║   ██████╔╝█████╗  ██║  ███╗███████║██████╔╝██████╔╝██║   ██║ ╚███╔╝      ║
║   ██╔═══╝ ██╔══╝  ██║   ██║██╔══██║██╔═══╝ ██╔══██╗██║   ██║ ██╔██╗      ║
║   ██║     ███████╗╚██████╔╝██║  ██║██║     ██║  ██║╚██████╔╝██╔╝ ██╗     ║
║   ╚═╝     ╚══════╝ ╚═════╝ ╚═╝  ╚═╝╚═╝     ╚═╝  ╚═╝ ╚═════╝ ╚═╝  ╚═╝     ║
║                                                                           ║
║                    All-in-One Deploy Script v2.0                          ║
╚═══════════════════════════════════════════════════════════════════════════╝


═══════════════════════════════════════════════════════════════════════════
Step 1/6: Installing System Dependencies
═══════════════════════════════════════════════════════════════════════════

ℹ Installing packages...
✓ System dependencies installed

═══════════════════════════════════════════════════════════════════════════
Step 2/6: Creating User & Directories
═══════════════════════════════════════════════════════════════════════════

✓ Service user 'pegaprox' created
✓ Directory structure created

═══════════════════════════════════════════════════════════════════════════
Step 3/6: Downloading PegaProx from GitHub
═══════════════════════════════════════════════════════════════════════════

ℹ Cloning repository...
✓ Repository cloned
✓ All files copied to /opt/PegaProx

═══════════════════════════════════════════════════════════════════════════
Step 4/6: Setting up Python Environment
═══════════════════════════════════════════════════════════════════════════

ℹ Creating virtual environment...
ℹ Installing Python packages...
ℹ Installing from requirements.txt...
✓ Python environment ready

═══════════════════════════════════════════════════════════════════════════
Step 5/6: Downloading Offline Assets
═══════════════════════════════════════════════════════════════════════════

ℹ Downloading static files for offline mode...
.....................................................................................
✓ Offline assets downloaded

═══════════════════════════════════════════════════════════════════════════
Step 6/6: Configuring Service
═══════════════════════════════════════════════════════════════════════════

Select access port:
  1) Default (5000) - Standard ports
  2) HTTPS (443)    - Professional setup
  3) Custom         - Enter your own

Choice [1-3, default=1]: 1
✓ Using ports: 5000 (Web), 5001 (VNC), 5002 (SSH)
Created symlink /etc/systemd/system/multi-user.target.wants/pegaprox.service → /etc/systemd/system/pegaprox.service.
✓ Systemd service created and started
Waiting for database initialization...
✓ PegaProx is running!

╔════════════════════════════════════════════════════════════════════════════╗
║                    Installation Complete! 🎉                               ║
╚════════════════════════════════════════════════════════════════════════════╝

  Web Interface: https://192.168.5.2:5000
  VNC WebSocket: https://192.168.5.2:5001
  SSH WebSocket: https://192.168.5.2:5002

💡 Tip: Check for updates in PegaProx Web UI
   Settings → Updates → Check for Updates

Commands:
  systemctl status pegaprox    - Check status
  journalctl -u pegaprox -f    - View logs
  systemctl restart pegaprox   - Restart service
Máris használhatjuk
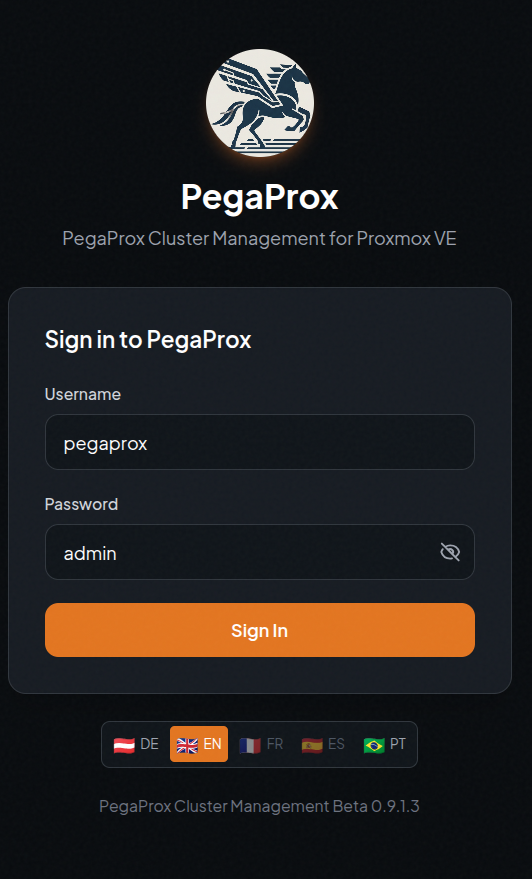
Vedd elő a kedvenc böngésződ, és írd be a szervered IP címét és a választott portot, majd jelentkezz be a default jelszóval (alapból németül beszél, alul választhatsz egyéb nyelveket):
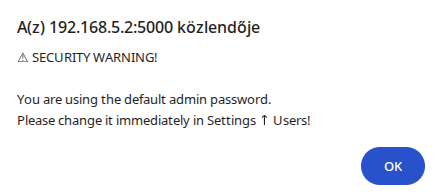
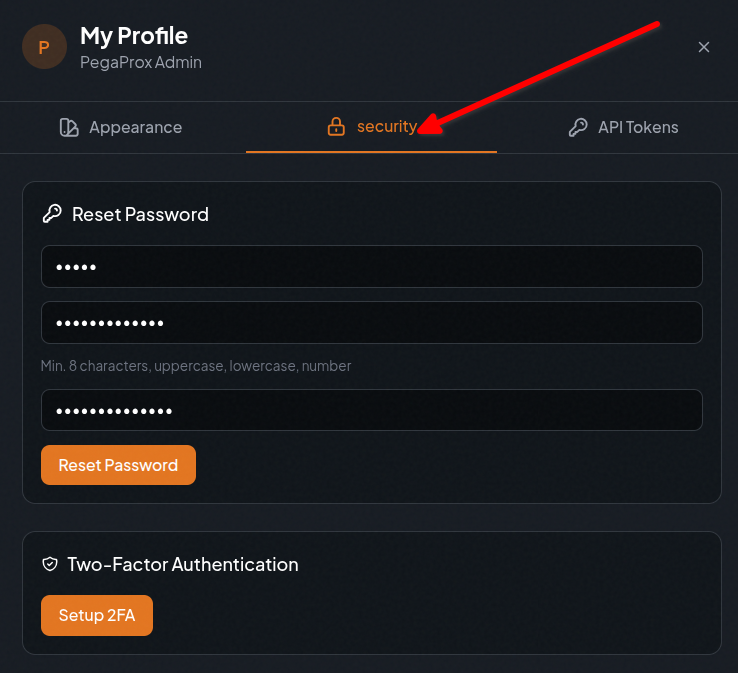
A sikeres bejelentkezés után figyelmeztet, hogy változtasd megy a gyári jelszót:
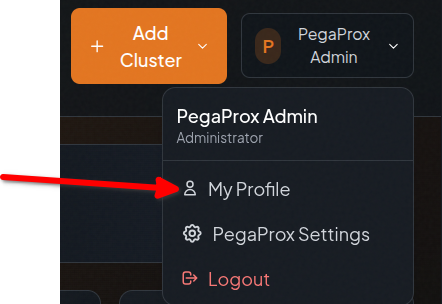
Jobb felső sarok -> PegaProx Admin -> My Profile:
Security fül:
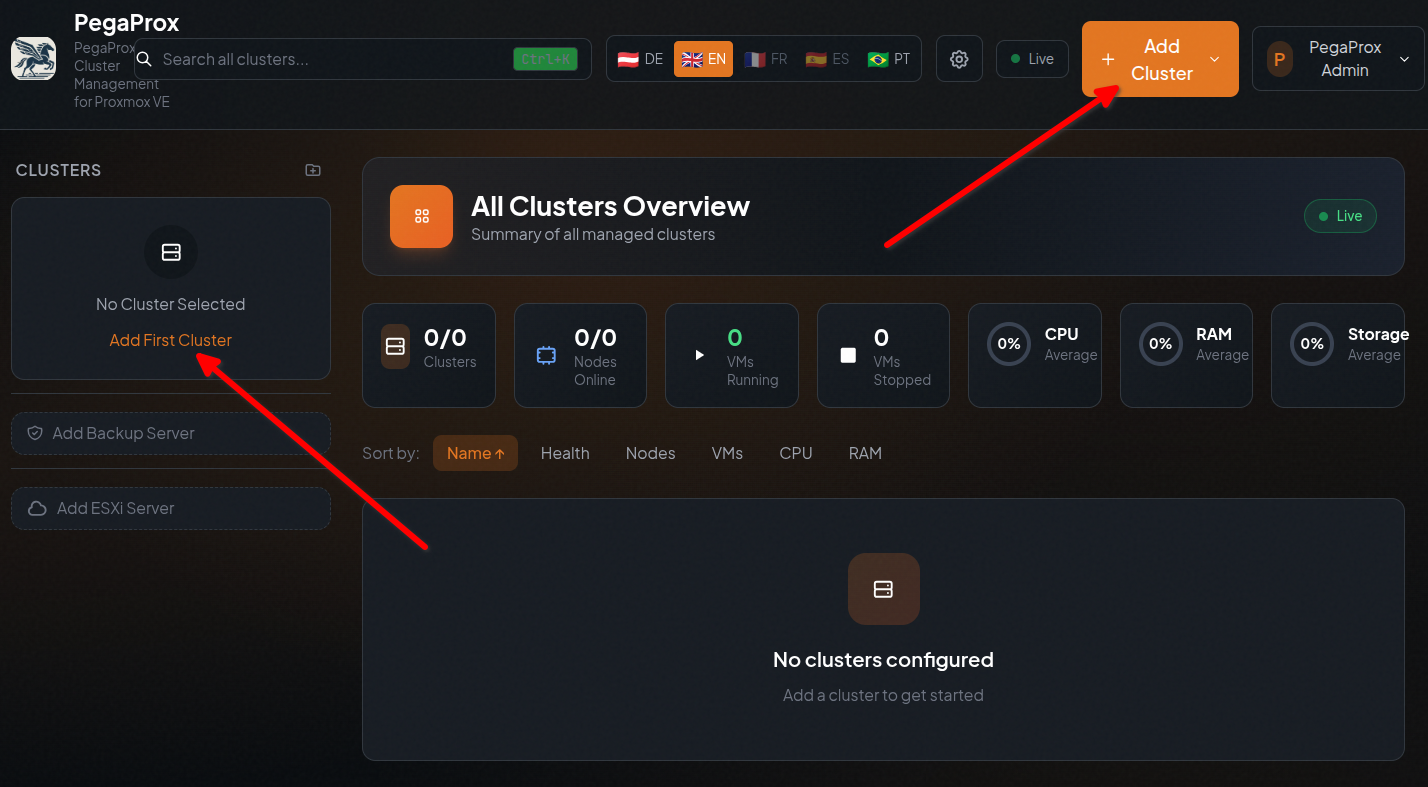
Íme az üres dashboard, vegyünk fel egy szervert:
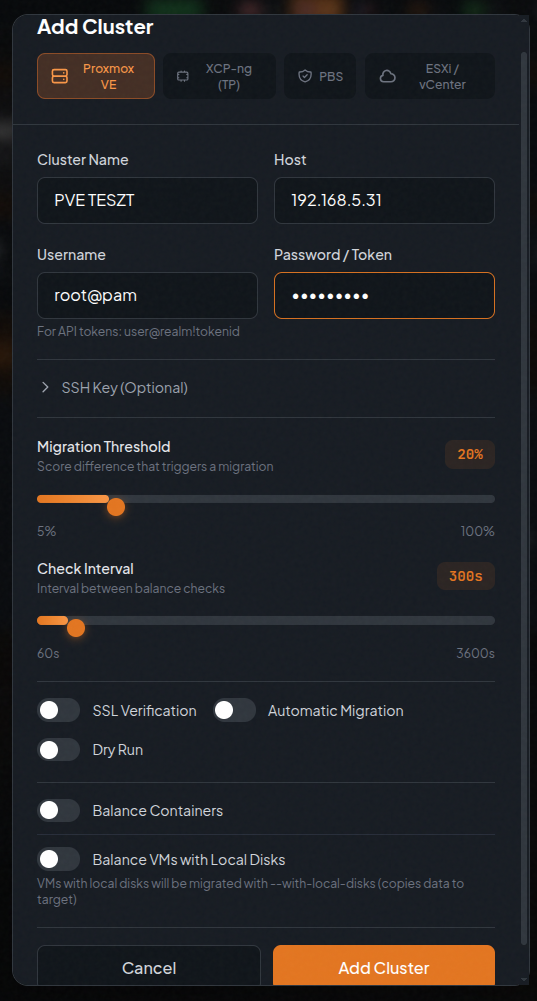
Adjuk meg a proxmox egyik hosztjának adatait:
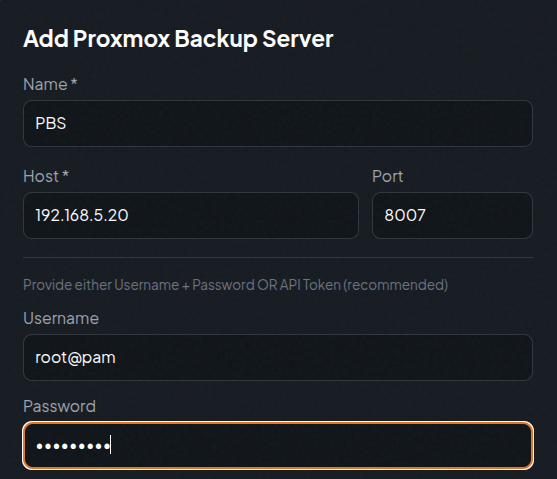
Adjuk hozzá a proxmox backup szervert is (ha van):
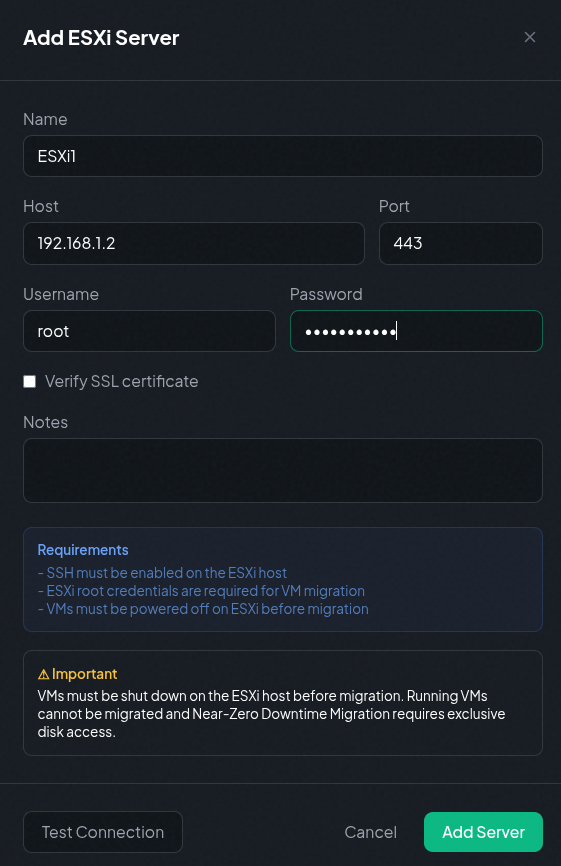
Illetve VMware ESXi hosztot vagy vcentert is hozzá adhatunk:
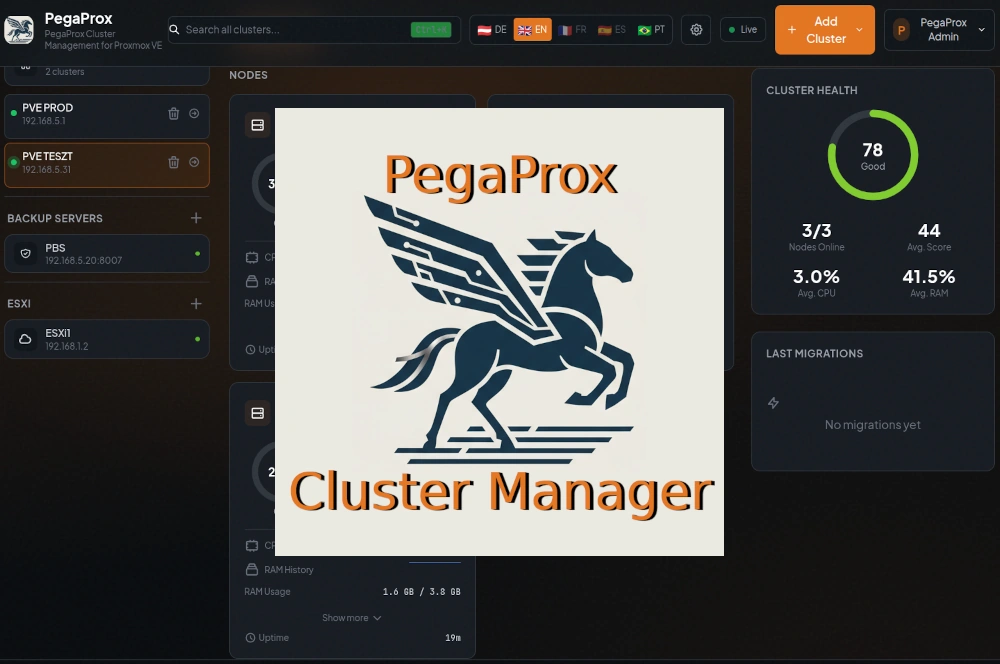
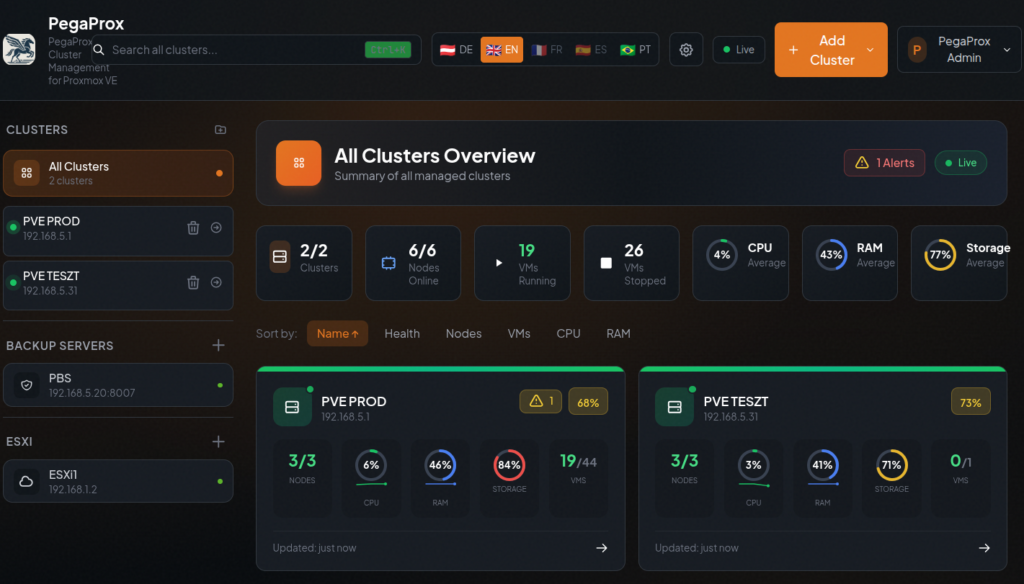
Most már kicsit élőbb lett a dashboardunk (minden klaszter nézet):
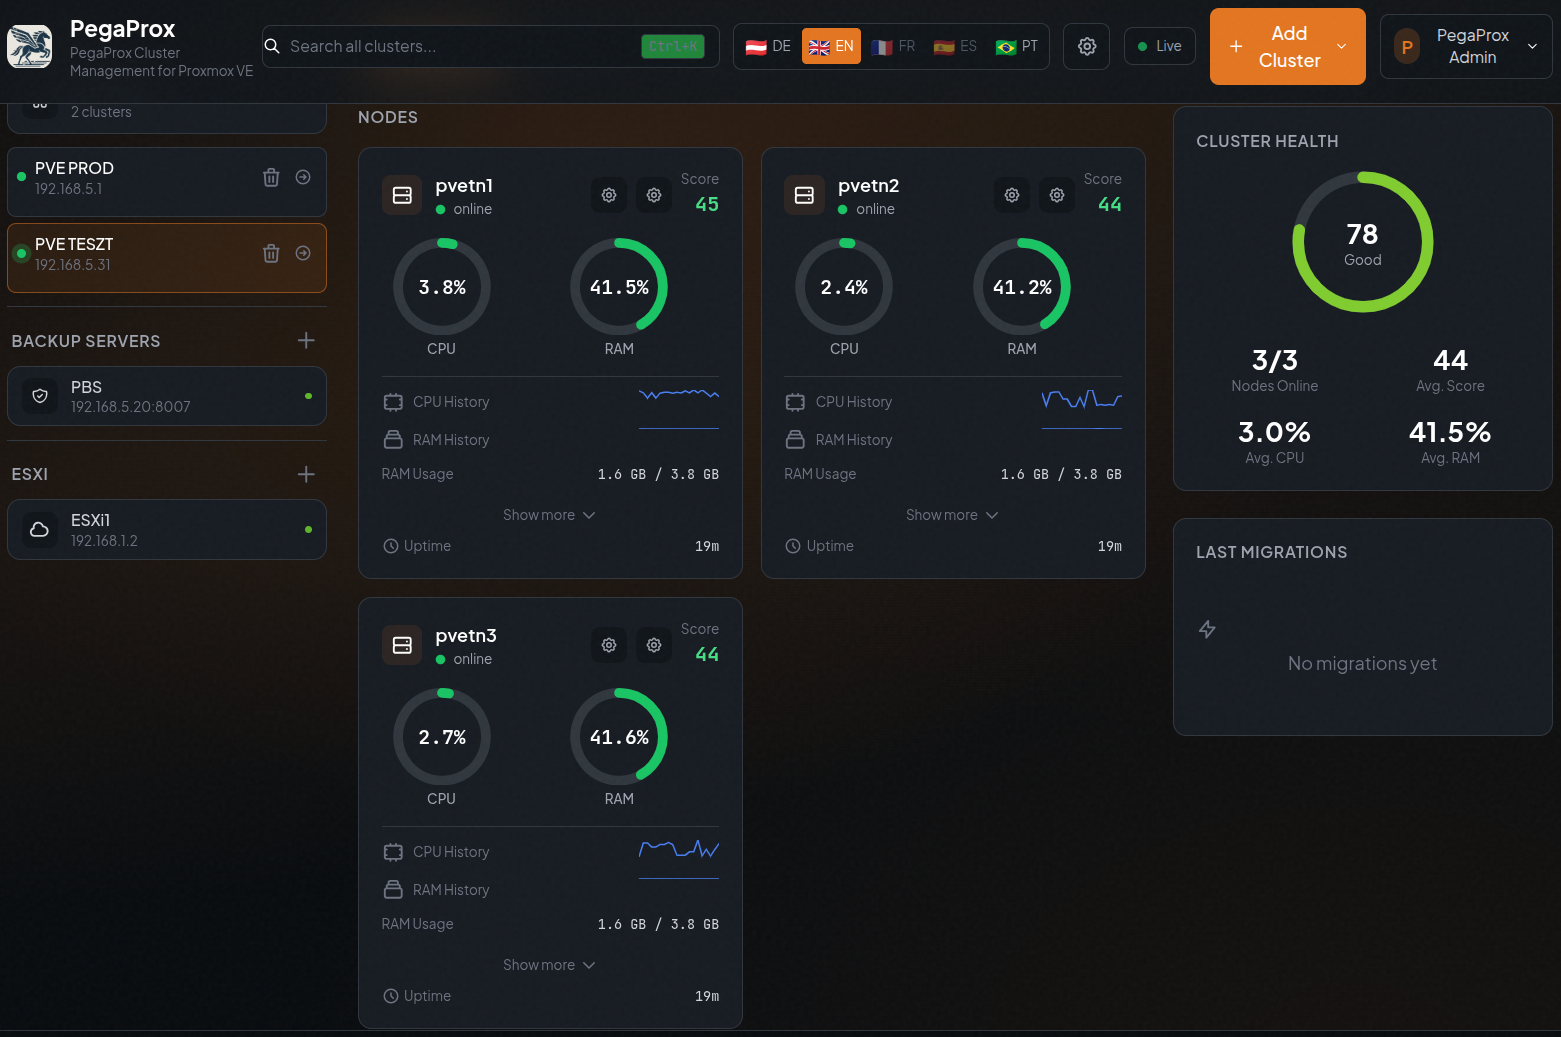
PVE TESZT klaszter nodes:
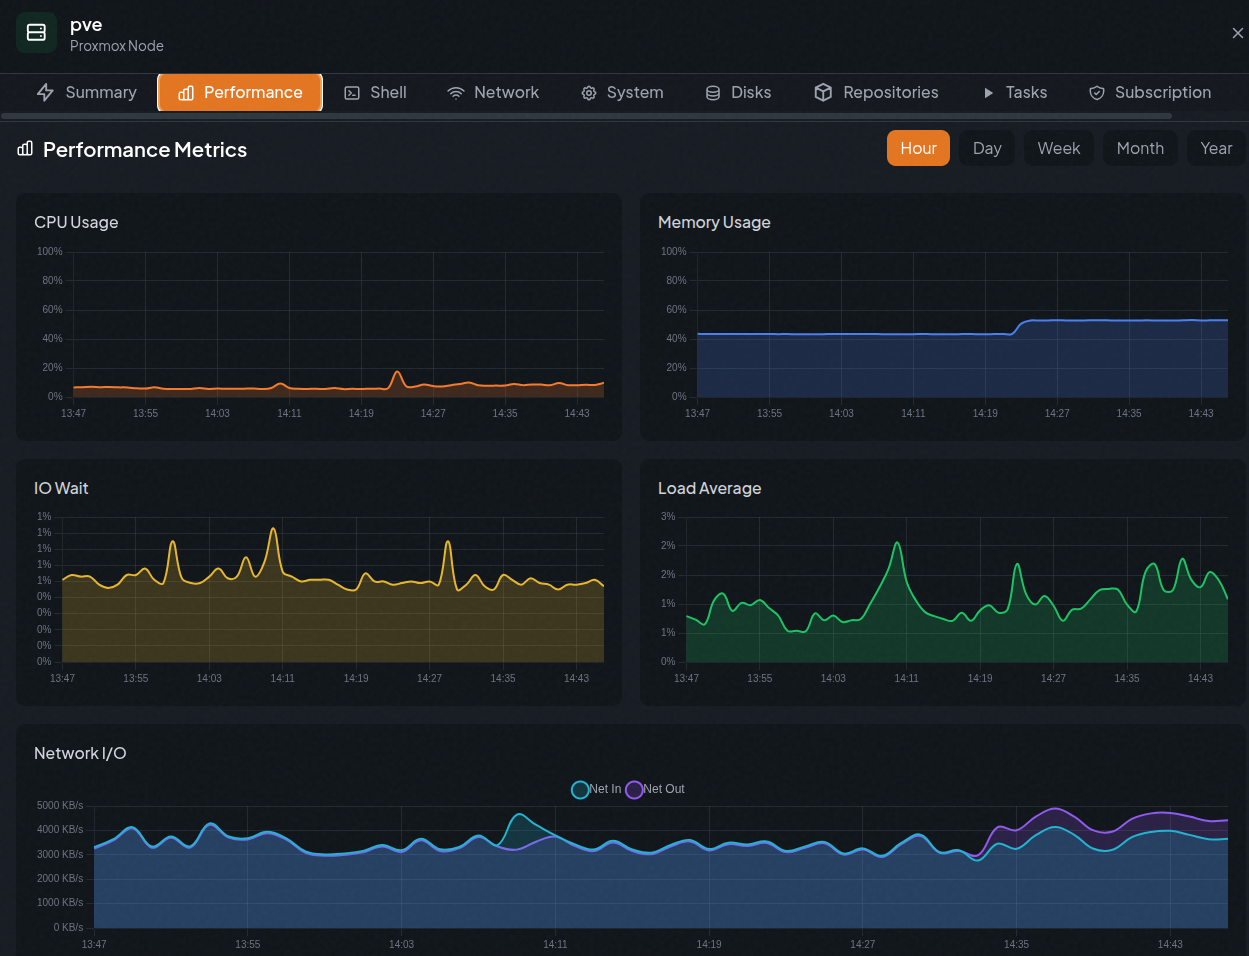
A pve node grafikonjai:
Végszó
A PegaProx kis erőforrás igényű, beéri ~150 MB memóriával és 173 MB tárhellyel. Futtathatod Proxmoxon LXC konténerben is, vagy egy már létező VM-ben (mint én).